First successful homebrew gear
As I mentioned before, one of the joys of ham radio is to invent engineering challenges and then solve them as cleverly as possible. And it’s a great excuse for hardware hacking. Over the weekend, I built a teensy morse-code radio (on a single fixed frequency!) called the Rockmite… but I’m still trying to debug why it’s not working.
Meanwhile, a much simpler project arrived at my door: a tiny circuit board that turns any two pieces of metal into morse code paddles. By simply making touch-contact with the metal, the resistance triggers the ‘dits’ and ‘dahs’. My goal was to combine this with my existing keyer (a device that creates perfectly-timed morse code, which sits between your paddles and your radio.)
Here’s a short video showing the two circuit boards hooked up by temporary wires:
I first tried fitting the keyer board, paddle board, and a 9V battery all into an altoids tin, but alas — the keyer board’s controls were too tall for the tin, and I didn’t feel like disconnecting them and mounting them directly to the walls of the tin. But then I had a great idea! If the paddle board only needed 6V to operate, I could stack two coin-cells together. And then the coin cells and paddle board could be stuffed into the keyer’s existing black plastic enclosure!
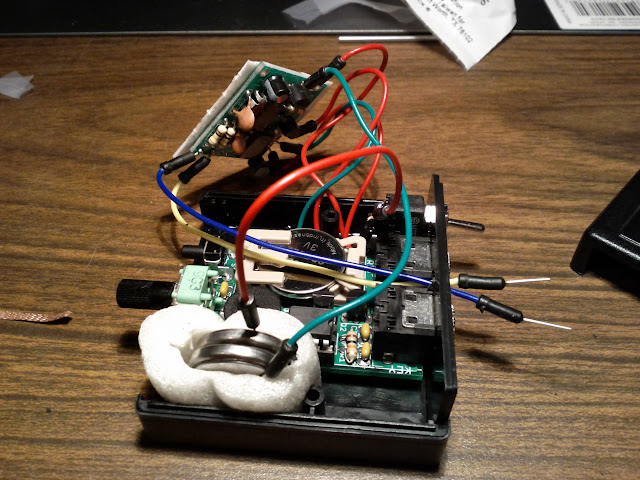
Notice how the two coin cells are tucked into a slitted styrofoam peanut. To change the batteries, I just yank the electrodes out of the peanut, drop new batteries in, then re-stuff the elecrodes back in. Meanwhile, I hooked up the batteries to a toggle switch added to the back of the device. I had to drill an extra hole for the paddle wires to come out as well. Here’s the finished product:

And finally, a short video where I demonstrate how it works:
A huge thanks to Dale N0XAS for the picokeyer circuit and to Sumner WA1JOS for his touch keyer board. Great fun to combine them!